You have a photo. You need to know where it came from. Who is in it. Or what is hidden inside it.
Most people open Google Images. They drag and drop the picture. They get a few results. Then they give up.
That is a mistake.
Google is powerful. But it is not the best tool for every job. Professional OSINT investigators know that different reverse image search tools for OSINT reveal different types of information. Some find faces. Others find metadata. A few find deleted content that Google has never seen.
In this practical guide, I will show you exactly how to use 7 tools beyond Google. Each tool has a specific strength. I will tell you when to use it and how to get the best results.
Let us get started.
What Is Reverse Image Search (And Why Google Is Not Enough)
A reverse image search takes a picture and finds where else that picture appears online. It also finds visually similar images.
Google does this well for popular images. But Google has blind spots.
Google struggles with:
1. Faces (privacy restrictions)
2. New or niche images
3. Metadata (Google strips most of it)
4. Deleted or archived content
That is why OSINT professionals use multiple reverse image search tools for OSINT. Each tool sees something different.
Below are the 7 best tools. Use them in order for the most complete investigation.
Tool 1: Yandex Images (Best for Faces and People)
Yandex is Russia's largest search engine. Its image search is frighteningly good at finding people.
Why it works:
Yandex uses different facial recognition algorithms than Google. It finds matches that Google misses, especially for:
1. Non-celebrity faces
2. Older photos
3. Pictures with poor lighting
4. Side profiles
Practical use case:
You have a photo of someone from a dating app or social media. Google finds nothing. Utilize Yandex to find a legitimate LinkedIn or Facebook profile.
Steps:
1. Visit images.yandex.com
2. Select the camera icon on the search bar
3. Upload the photo or copy and paste in the url.
4. Hit enter
5. Browse your results and see similarities in the similar images list.
Pro tip: Yandex often finds cropped or edited versions of a face. If someone blurred their background or changed the photo's color, Yandex still finds matches.
When to use Yandex: Always use Yandex first for any photo containing a human face.
Tool 2: Bing Visual Search (Best for Screenshots and Text)
Microsoft's Bing is underrated. Its visual search excels at one specific thing: reading text inside images.
How it does this: OCR (Optical Character Recognition) is used by Bing to extract text from things such as screenshots, memes, and documents before searching that text.
Practical use case:
A screenshot could be sent to you containing either a tweet, news article, or handwritten note. Google would be able to see the picture. Bing will be able to extract the words contained within the screenshot and will be able to determine the location of the original post (the Tweet, news article, etc.).
How to use it (step by step):
1. Go to bing.com/visualsearch
2. Drag and drop the image you would like to locate the originating text for
3. To identify images, Bing will automatically detect all text and objects within your photos.
4. Click on any box where it found the text to do a web search for that phrase.
5. Look at the results of that web search to find the original source of the text you found in the photo.
Bing is an excellent source for screenshot searches of error messages, product labels, or any type of image with readable prints. Bing will provide you with a much wider range of documents, forums, and postings that no other tool would have.
When to use Bing: Any time you wish to search for the originating source of the text within an image.
Tool 3: TinEye (Best Reverse Image Search Engine for Locating an Original Source)
TinEye is the first reverse image search engine and will only search for the original image and not other images that are similar.
Why it works:
TinEye uses a unique fingerprinting technology. It ignores color changes, resizing, and minor edits. It tracks where an image has appeared over time.
Practical use case:
when searching for the date a photo was originally uploaded. In this case, it will display images in order from old to new in order to find the original poster (copyright holder) of the photo.
Steps to Use TinEye:
1. Go to the website at www.tineye.com
2. Upload an image or paste the URL of an image you want to search on TinEye.
3. Click on the search button which appears as a magnifying glass.
4. Choose “oldest” for your sort option over “best match”.
5. The first result will generally be either the name of the original image uploader or the name of the copyright holder.
Tip: TinEye has a free extension for Firefox, Chrome, and Safari. This extension enables you to quickly search images from any location on the web—right click on the image in question and select "Search with TinEye" to save time in investigations.
When to use TinEye:
When you want to find someone else’s picture, TinEye is used to find where an image was first found online; it’s not a tool for finding similar images or other social media profiles belonging to that individual.
Tool 4: PimEyes (Best for Finding a Specific Person)
PimEyes is a facial recognition search engine. It is controversial. It is powerful. It is essential for OSINT.
Why it works:
PimEyes scrapes publicly available images from across the web. It creates a facial fingerprint. Then it finds every website where that face appears.
Practical use case:
You have a photo of a person. You need to find their other social media profiles, blog posts, or professional headshots. PimEyes has the ability to search for users even if they have used a different name at the time of uploading an image.
How to use it (step by step):
1. Visit pimeyes.com
2. Upload a good quality and frontal view photo of the subject's face
3. Enter the verification code from the captcha (in order to prevent bots)
4. Look at the preview images that are free of charge (but they will be blurred out)
5. Purchase a one day pass to access and see the unblurred previews and corresponding links.
Important warning: PimEyes is powerful but expensive for full access. Use the free preview to see if matches exist. Only pay for the one-day pass if you need specific URLs.
Tip: Crop the photo to just the person’s face. Background items can confuse the algorithm when uploading a photo.
The PimEyes service allows users to search for images of a specific person across multiple sites by searching for them based on facial identification through a photo that has been clearly identified as theirs.
Tool 5: FotoForensics (Best for Detecting Fake or Edited Images)
Fotoforensics is very useful for detecting fraudulent or edited images. Unlike other tools, Fotoforensics isn't about where you find the image; Fotoforensics is about what has been done or changed within the image itself.
Why it works:
Fotoforensics uses a process called Error Level Analysis (ELA). By looking for areas that have been altered digitally, ELA allows us to visually see the differences in compression levels of each area of a picture to identify alterations to that picture.
Practical use case:
You receive a suspicious photo, maybe a screenshot of a conversation, a news image, or a profile picture. You want to know if it has been photoshopped or manipulated. FotoForensics shows you exactly where edits were made.
How to Use Fotoforensics:
1. Go to fotoforensics.com
2. Find your photo on your computer using the 'Browse' buttom.
3. Use the "Upload" button to send the picture to Fotoforeensics.
4. Wait for analysis
5. Look at the ELA results; any place that appears to have bright white on it in the photo (compared to places that appear black) indicates greater change than the other parts of the photo.
How to read the results:
1. If the entire image is dark: No edits have been made (could still be a fake)
2. If edges of objects appear to be bright: These were likely cut and inserted into the image from another photo
3. If parts of your image have different brightness levels: Those parts were saved in different time periods
Tip: Always view an ELA result beside the original photo; the human eye misses changes that ELA will indicate.
When to use Fotoforensics? Anytime you want to trust an image for an investigation; always verify authenticity of an image prior to trusting it.
Tool 6: ExifData.com (Best for Hidden Metadata)
Every time you take a photo with your smartphone or digital camera, it captures a certain amount of hidden information about that shot known as EXIF metadata. This includes things like GPS coordinates, which help to identify exactly where the photo was captured, along with the camera model, date, and time stamp for when the image was created.
What Makes ExifData Work:
Social Media Sites. A majority of social media platforms remove or strip EXIF data from the uploads. However, not all sites do this, plus many users will also upload original files directly to message boards, blogs or cloud storage, thus retaining their EXIF data.
Practical Application Example:
If you find a picture that was uploaded to a forum or an advertisement listing for a house or an old blog post you can extract out its GPS coordinates and thus identify exactly where the photo was taken.
How To Use ExifData.com (A Step By Step):
1. Download the original picture file (do not take a screenshot as this will strip out the EXIF data)
2. Go to exifdata.com
3. Click select file
4. Click view metadata
5. Find the following fields:
a) GPS Latitude/GPS Longitude and copy those into Google Maps
b) DateTimeORIGIN
c) Make/Model
d) Software
Pro tip: If the image is on a website, right-click and select "Save Image As" to download the original. Screenshots erase EXIF data completely.
When to use ExifData: Always check EXIF data on every image you download during an investigation. You never know what is hidden.
Tool 7: Baidu (Best for Asian Creators and Chinese Sources)
As the largest Chinese search engine, Baidu's image search functions are incredibly powerful, finding an abundance of content that is missed by Google, Yandex or Bing.
Why? Baidu indexes Chinese language websites, forums and social media. Many of these sites are blocked from or not indexed by Western search engines.
When: If you are researching a person or event with possible ties to China, Taiwan, Hong Kong or other Chinese-speaking populations, Baidu is capable of producing images to substantiate those connections.
Follow these steps:
1. Go to image.baidu.com
2. Select the camera icon in the search box
3. Either upload the image you wish to search for or paste in the URL of the image
4. Select the blue search button
5. Use the Google Translate browser extension to read the results
Tip: Baidu works best with images containing Chinese text; images containing products made in China; and images containing Asian faces. Baidu has limited efficacy with images only containing Western content.
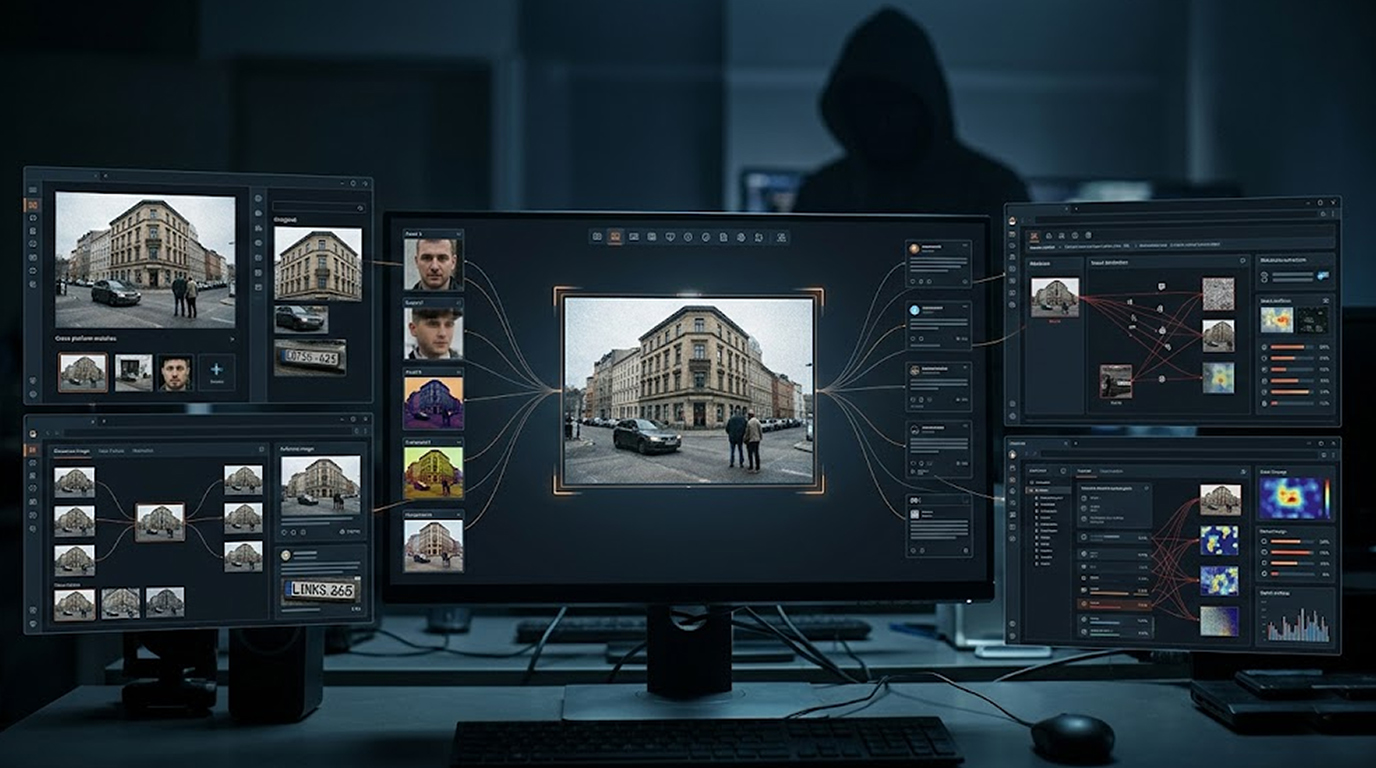
Complete OSINT Workflow - tools used in sequence
Do not guess which tool to use. Complete each step in the sequence to investigate an image.
Step 1 - Examine image data
Use ExifData.com to check for GPS location(s), date and other related information from the image so you can gather that data prior to it possibly getting deleted.
Step 2 - Validation
Use FotoForensics to look for image alterations or edits.
Step 3 - Face search
Upload an image to Yandex Images for facial recognition. Use PimEyes to search on multiple images for the same person.
Step 4 - Text image search
Use Bing Visual Search to search other images and screenshots containing text.
Step 5 - Search for the original image from which the photos are derived
Locate the first appearance using TinEye and sort by oldest.
Step 6 - Search internationally
Use Baidu Images for Asian content if applicable.
Step 7 - Google is your last resort
Use Google Images to gather mainstream content that may not have been picked up using the previous searches.
Real-World Example: Where to Look for a Potentially Fake Profile Image
Here’s an actual example of how this can work.
You’re contacted by a questionable account. The profile image looks like a generic stock photograph. You would like to track down who the actual source is.
Step 1: Save the profile image (right-click -> Save As).
Step 2: Go to ExifData.com, and upload the profile image. No metadata was available for this file. Next.
Step 3: Go to FotoForensics, upload the file, and perform an ELA analysis. The ELA results in a uniform dark area, indicating that there were no visible edits made to this image. The image should be original; continue searching.
Step 4: Go to Yandex Images, upload the file, and review the results. Yandex found 12 different links to this same image file. Three were links to different profile names on LinkedIn. The perpetrator uses a different name than what appears on the questionable account profile.
Step 5: Go to TinEye, upload the file, and sort the results by oldest. The oldest occurrence of this image is a stock photo from 2019. This image does not belong to a real person.
In conclusion: The questionable account has an image from a stock photo site. Block and report the account.
This investigation took less than five minutes to conduct with 7 different OSINT reverse image searches.
Common Mistakes That Can Ruin Your Reverse Image Search
To improve your reverse image search results, don’t make the following mistakes:
Mistake #1: using screenshot instead of original file
When using a screenshot, you lose any embedded metadata, and the image quality is less than that of an original file. Always try to save the original image, if available.
Mistake #2: Searching with cropped or edited images
The more you change an image, the harder it is to match. Search with the original version first.
Mistake #3: Using only Google
Google misses most of what the other tools find. Use all 7 tools in sequence.
Mistake #4: Ignoring metadata
EXIF data can give you a GPS location in seconds. Always check before you upload anywhere.
Mistake #5: Giving up after one search
Different tools index different databases. If Yandex finds nothing, try Bing. If Bing fails, try Baidu.
Legal and Ethical Guidelines
Reverse image search is powerful. Use it responsibly.
Do:
1. Investigate images of yourself or your family
2. Verify suspicious accounts or scams
3. Find the original source of content
4. Protect your intellectual property
Do not:
1. Stalk or harass individuals
2. Investigate someone without a legitimate reason
3. Share private information discovered through searches
4. Use facial recognition tools for illegal purposes
OSINT is about open source intelligence. That means publicly available information. If a photo is public, you can search for it. But what you do with the results matters.
Conclusion: Google Is Just the Beginning
You now have 7 powerful reverse image search tools for OSINT. Each one does something different. Together, they form a complete investigation system.
Note the order of steps involved in your investigative process:
1. ExifData.com (to determine metadata related to the image)
2. FotoForensics (to evaluate the authenticity of the image)
3. Yandex and PimEyes (to find matching faces)
4. Bing (to search for text within the image)
5. TinEye (to find the original source of the image)
6. Baidu (for finding Asian content)
7. Google (as a last resort)
Bookmark these tools today. Practice on your own photos first. Learn how each one behaves. Then use them when it matters.
The next time someone sends you a suspicious image, you will know exactly what to do. And you will find answers that Google never could.
FAQ Section
1. Which reverse image search tool for OSINT is best for finding faces?
Yandex Images is the best free tool for facial recognition. It finds matches that Google completely misses. For more advanced searches, PimEyes offers deeper results but requires payment for full access.
2. Can I find where an image originally came from?
Yes. Use TinEye and sort results by "Oldest." The first result is likely the original source. This works best for images that have been shared multiple times across the web.
3. How do I find hidden data inside a photo?
Use ExifData.com. Upload the original image file (not a screenshot). Look for GPS coordinates, date and time, and camera model. Copy GPS coordinates into Google Maps to see exactly where the photo was taken.
4. Are these reverse image search tools for OSINT free to use?
Most have free tiers. Yandex, Bing, TinEye, ExifData, and FotoForensics are completely free. PimEyes offers free previews but requires a paid subscription for full results. Baidu is free but may require translation.
5. What is the most accurate reverse image search tool?
No single tool is most accurate for everything. Yandex is best for faces. Bing is best for text. TinEye is best for exact matches. Use all of them in sequence for the most complete results.